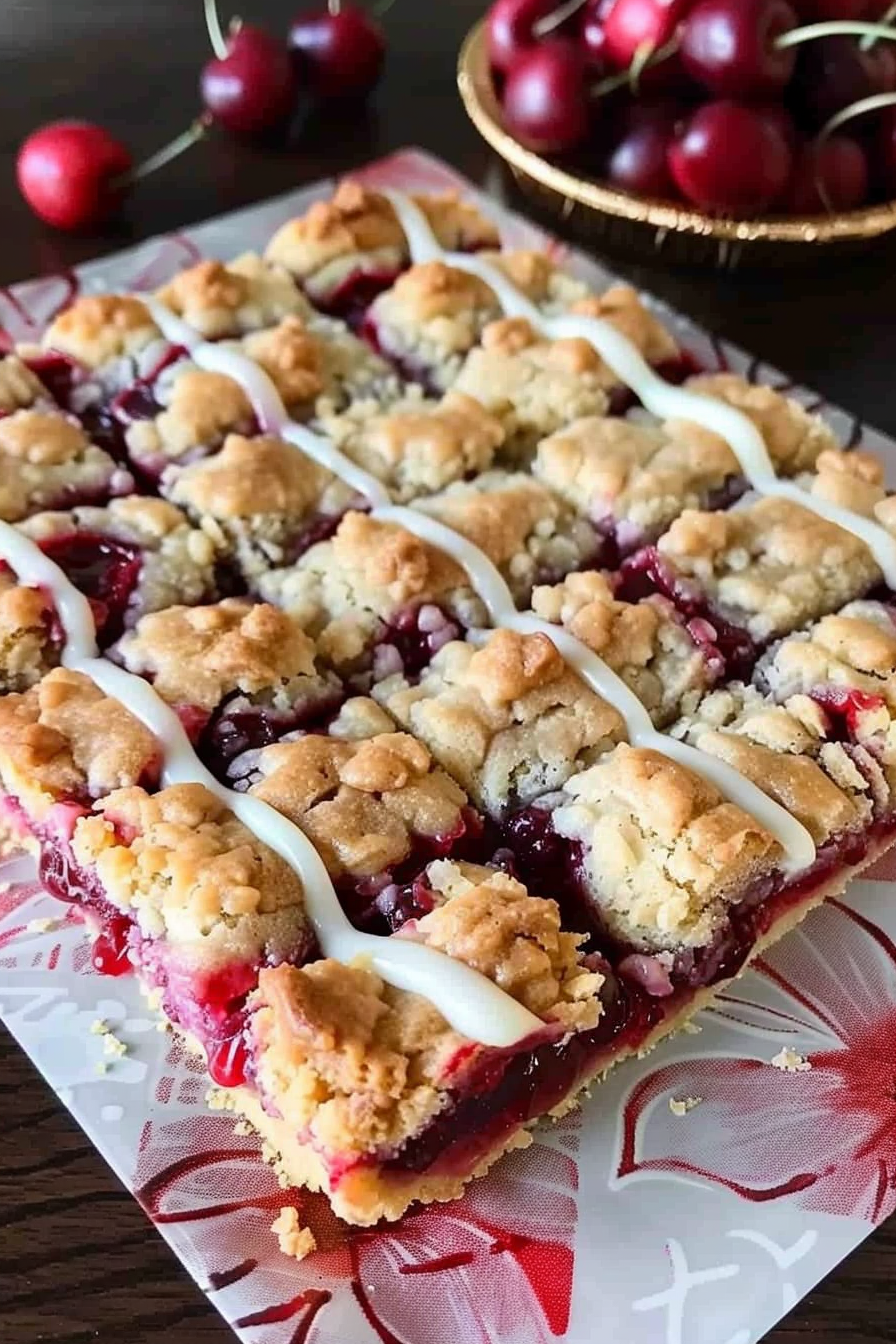
These cherry pie bars are both delicious and visually appealing! They are a homemade treat that’s simple to prepare, slices beautifully, and serves effortlessly. Feel free to use any type of pie filling!
A DELIGHTFULLY EASY HOMEMADE DESSERT
Want to save this recipe? Enter your email below and we’ll send the recipe straight to your inbox!
NOTE: By saving this recipe, you agree to join our weekly recipes newsletter.
Is there a sight more charming than a dessert adorned with cherries or strawberries? I adore the vibrant hues and delightful tastes, making them ideal for festive occasions. You can experiment with different pie fillings—blueberry is another personal favorite. I always enjoy incorporating a touch of almond extract when working with cherry. It subtly amplifies the cherry flavor without dominating it.
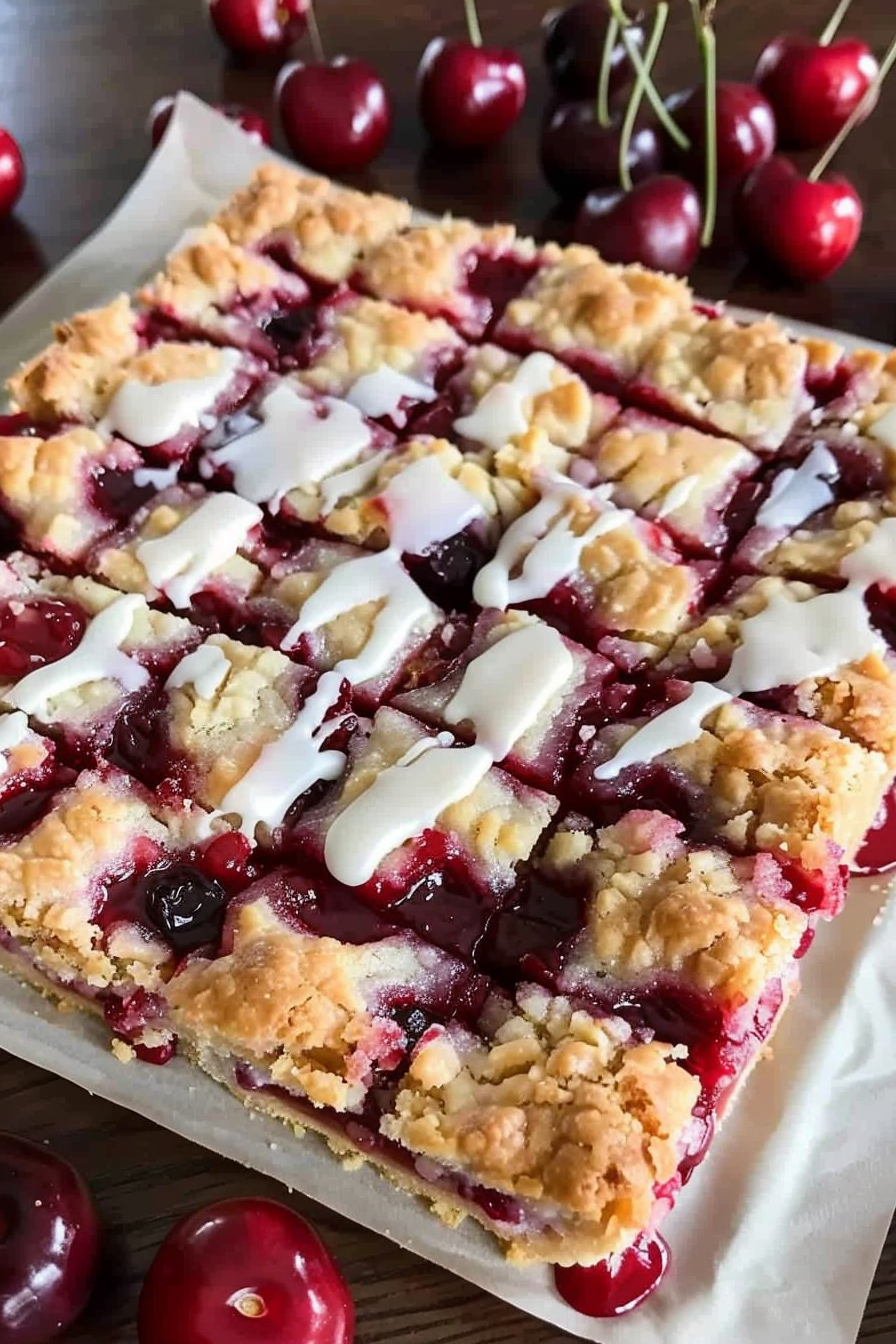
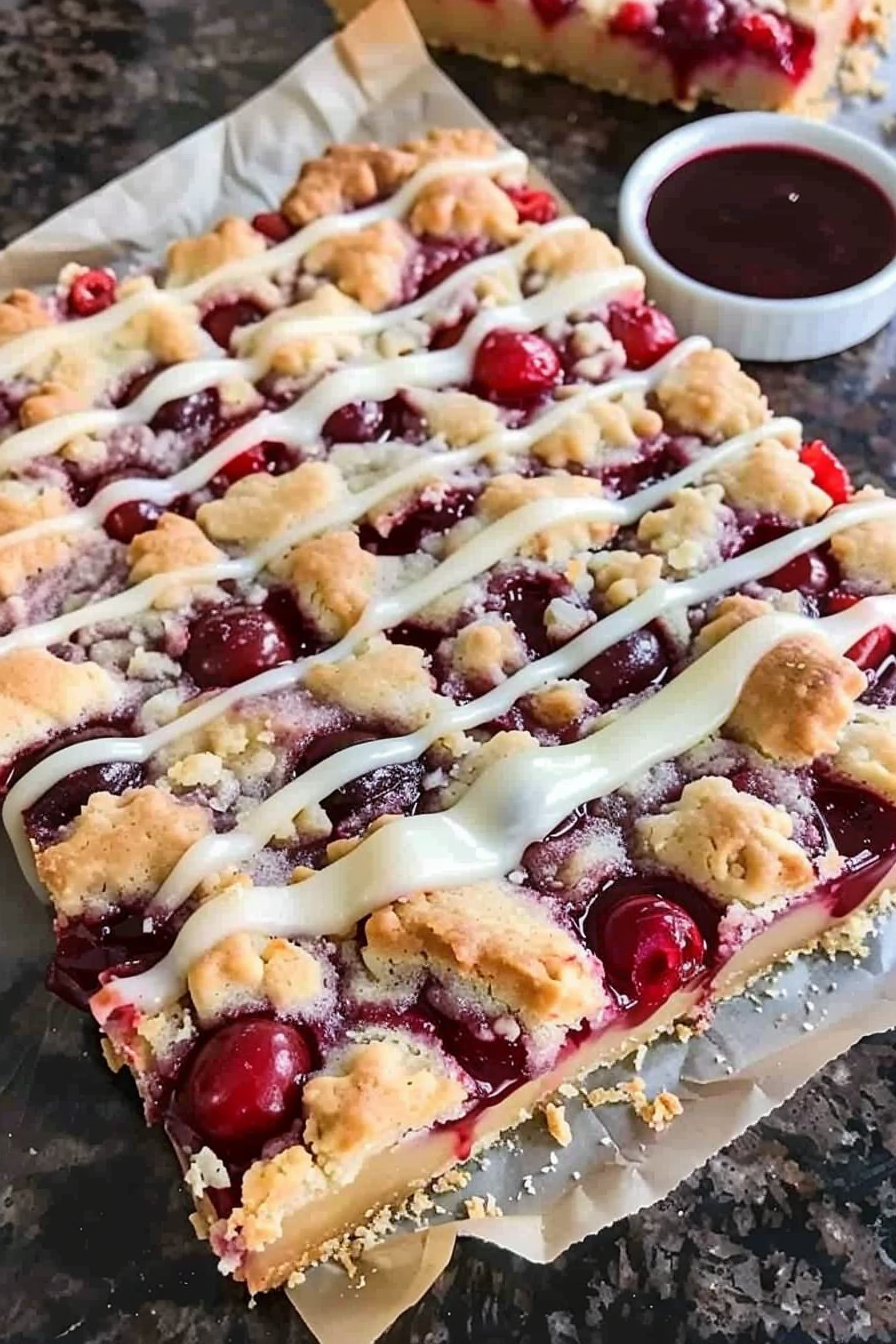
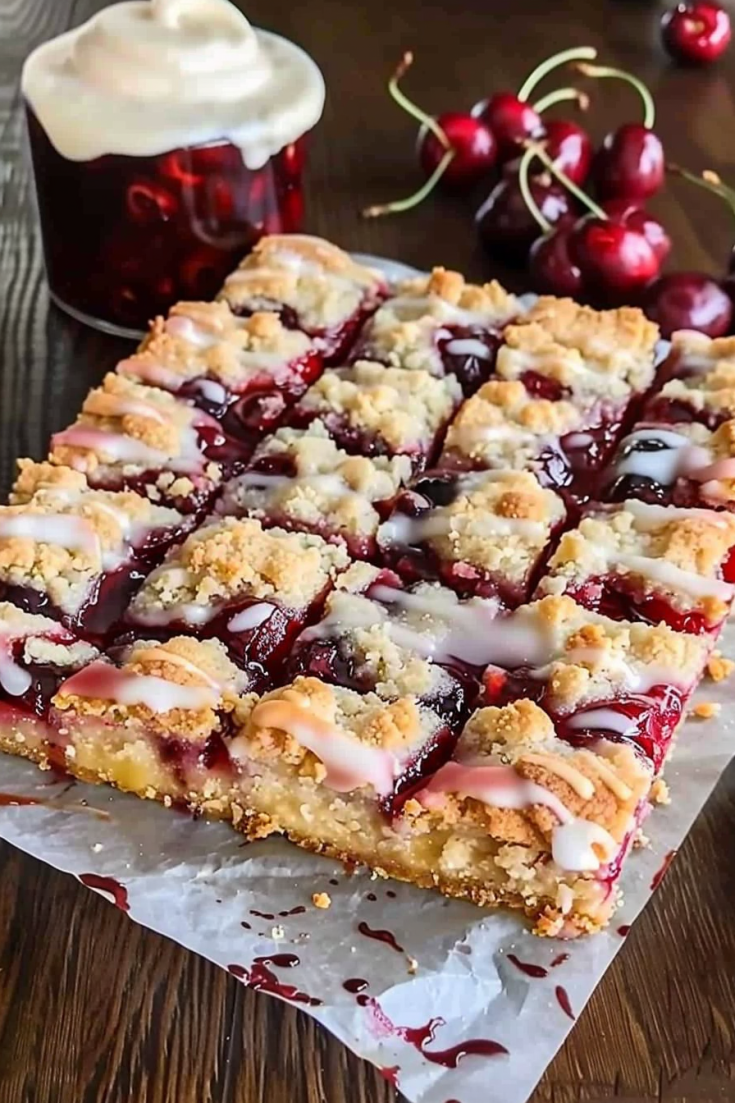
These crumb-topped cherry pie bars are simply irresistible, combining a deliciously sweet and tart cherry pie filling with a buttery, crumbly brown sugar streusel topping. The filling uses convenient frozen sour cherries and is prepared swiftly on the stove. Both the crust and the crumble topping are crafted from the same easy-to-make one-bowl mixture, so you can forget about fiddling with traditional pie crusts today. To top it all off, a drizzle of almond icing adds the perfect flavor enhancement.
Today, we’re swapping out the usual round pie dish for these more straightforward pie bars. While I do enjoy the process of making a full pie from scratch—a true labor of love—making pie bars is significantly faster and simpler. And quite often, the convenience and ease are incredibly enticing!
That’s the reason I’ve developed bar adaptations of some of the favorite pies featured on my website, including pumpkin pie bars, salted caramel apple pie bars, and blueberry pie bars. If you’re fond of cherry pie but feel daunted by the prospect of making pie crust from scratch, this crumb-topped cherry pie bar recipe is perfect for you. It offers the delightful taste of a jammy cherry filling, combined with the simplicity of preparing a single “dough” that serves as both the crust and the topping—eliminating the need for the meticulous chilling, rolling, or shaping associated with traditional pie crusts.
Discover the Delight of Cherry Pie Bars
– Simpler than traditional pies: both crust and topping come from a single, easy-to-mix batter.
– Luscious, homemade cherry pie filling featuring juicy, jam-like consistency.
– Crafted with frozen sour cherries for a treat that’s available all year long!
– Faster than most fruit fillings: no need to pit, peel, or chop the fruit.
– A convenient option for those avoiding eggs in baking.
– Topped with a delightful almond-flavored icing.
– Effortlessly portable, easy to slice, serve, and perfect for freezing!

Creating a Crust and Topping From the Same Mix
This step is remarkably straightforward. You’ll need just one bowl and a spatula—no mixer necessary! This single dough serves double duty, forming both the crust and the topping.
• All-Purpose Flour: The foundational element of both the crust and crumble.
• Oats: Use either whole rolled oats or quick oats. Set aside 2 tablespoons of oats to incorporate into the crumble topping before it goes over the cherry pie filling.
• Brown Sugar: Brown sugar is perfect for this recipe, adding moisture and enhancing the flavor.
• Baking Powder: This ingredient ensures the crust and crumble remain light and airy. Without it, they would be too tough and dense.
• Lemon Zest & Salt: These are small but vital additions for tasteful bars, with lemon zest adding a burst of brightness to the sour cherry flavor, and salt boosting all other flavors.
• Melted Butter: Melted butter allows for a mixture that’s easy to stir by hand (similar to chewy chocolate chip cookies), binding the ingredients and adding flavor.
Mix everything together, then set aside about one-third of the mixture to use as the topping. Press the remaining mixture into a parchment-lined 9-inch square baking pan. Using parchment paper helps you lift the bars easily out of the pan for cutting. This method is also great for other treats like white chocolate raspberry cheesecake bars and M&M cookie bars.
Bake the crust for 10 minutes before adding the filling.
Similar to apples, cherries also come in various flavors, textures, and sizes. There are the “sweet, snacking cherries” enjoyed on their own, and the “sour” or “tart” varieties that are perfect for baking. Don’t be deterred by the term “sour.” Consider the delightful sour tastes found in baked goods such as cranberries, lemons, and rhubarb. Adding a bit of sugar can transform the sour into a deliciously sweet balance, creating treats that are tantalizing rather than too tart. Sour cherries, while lower in sugar than their sweet counterparts, have a higher acidity that enhances their robust flavor. Cooking these cherries helps concentrate their natural sugars, making them taste even sweeter.
When you purchase canned cherry pie filling, it typically uses sour cherries. Therefore, the sour cherry filling used in these pie bars captures the iconic taste of classic cherry pie filling. Imagine the perfect cherry pie from a quaint hometown diner—the kind you might dream about or read about in a storybook.
Preparing Sour Cherry Pie Filling on the Stovetop
I’ll guide you through preparing the sour cherry pie filling, highlighting the cooking process. Start with 3 and 1/2 cups (about 525g) of fresh or frozen sour cherries; there’s no need to thaw them. In a saucepan, mix the cherries with sugar and lemon juice. Heat the mixture until the cherries begin to release their juices. Next, transfer some of the warm cherry liquid into a small bowl containing cornstarch. Stir with a fork to dissolve the cornstarch completely. This step is crucial: similar to making blueberry and strawberry dessert sauces, a cornstarch slurry is essential. Directly adding dry cornstarch to the fruit can result in lumpy, undissolved bits. By using the cherry juice, you avoid adding extra liquid and ensure a smooth thickening of your pie filling. The result is a thick, homemade filling akin to what you find in canned varieties, but entirely from scratch.
FAQ:
Is it possible to substitute canned cherries for frozen cherries in this recipe?
It is not advisable to use canned cherries as a substitute in this recipe. Canned cherries often contain additional ingredients, which can affect the recipe. Moreover, even those canned in just water tend to be too soft and may turn mushy when cooked. Therefore, they are not recommended for this recipe.
Can fresh cherries be used instead of frozen ones?
Absolutely, fresh pitted cherries are a suitable replacement for frozen cherries in this recipe. The cooking and baking instructions remain unchanged.
Can I use dark sweet cherries instead of sour cherries?
Yes, you can use dark sweet cherries, either fresh or frozen, instead of sour cherries. We have tested this variation successfully, but recommend two adjustments: reduce the sugar in the filling to 1/3 cup (67 grams) and add an extra teaspoon of lemon juice. However, for optimal results, sour cherries are preferred.
Cherry Pie Squares with Crumb Topping
Ingredients
- Crust & Topping Ingredients:
- 1.5 cups (188g) all-purpose flour (spooned & leveled)
- 1 cup (85g) plus 2 tablespoons (11g) old-fashioned whole rolled oats, divided
- 1/2 cup (100g) packed light or dark brown sugar
- 1 teaspoon baking powder
- 1 teaspoon lemon zest
- 1/8 teaspoon salt
- 10 tablespoons (142g) unsalted butter, melted
- 1 teaspoon pure vanilla extract
- Cherry Filling Ingredients:
- 1.5 tablespoons (11g) cornstarch
- 3.5 cups (525g) frozen sour cherries (do not thaw)
- 1/2 cup (100g) granulated sugar
- 1 teaspoon fresh lemon juice
- 1/4 teaspoon almond extract
- Optional Almond Icing:
- 1 cup (120g) confectioners’ sugar
- 2 tablespoons (30ml) milk
- 1/4 teaspoon almond extract
Instructions
- Preheat the oven to 350°F (177°C). Line a 9-inch square baking pan with parchment paper, ensuring there is an overhang on the sides for easy removal. Set aside.
- For the crust: In a medium bowl, combine the flour, 1 cup oats, brown sugar, baking powder, lemon zest, and salt. Add the melted butter and vanilla, mixing until the mixture becomes like moist sandy crumbs without any dry spots. Press two-thirds of this mixture (about 2 cups or 345g) firmly into the prepared pan to form the crust. Bake for 10 minutes, then remove to cool slightly.
- For the filling: Set aside the cornstarch in a small bowl. Heat the cherries, granulated sugar, and lemon juice over medium heat in a saucepan, stirring occasionally until the cherries start to release their juices (approximately 4-6 minutes). Mix a few spoonfuls of cherry juice into the cornstarch until dissolved. Stir this mixture back into the cherries, bring to a boil, and cook until thickened (about 10 minutes). Stir in the almond extract.
- Pour the cherry mixture over the slightly cooled crust. Mix the remaining 2 tablespoons of oats into the leftover crust mixture and sprinkle over the cherry layer. Press gently with a spoon or spatula.
- Continue baking for 40-50 minutes, or until the topping is lightly browned and a toothpick inserted comes out mostly clean. Cooling time in the oven is about 45 minutes.
- Let the bars cool completely in the pan on a wire rack. For quicker cooling, refrigerate after about an hour.
- For the icing: Whisk together the icing ingredients, adjusting the milk to achieve the desired consistency. Drizzle over the cooled bars.
- To serve, lift the bars out of the pan using the parchment paper, place on a cutting board, and cut into squares. Clean the knife between cuts for neater squares.
- Store the bars at room temperature for up to 2 days or refrigerated for up to a week.
Notes
- Prepare ahead and freeze the cooled bars for up to 3 months. Thaw in the refrigerator overnight and bring to room temperature before serving.
- Recommended tools: 9-inch square baking pan, glass mixing bowl, whisk, citrus zester, citrus juicer, cooling rack.
- It's advised against using canned cherries as they can be too soft and sweet. If substituting with dark sweet cherries, adjust by reducing the sugar to 1/3 cup and increasing lemon juice by 1 teaspoon.
- For a larger batch, use a 9x13-inch pan, doubling the ingredients, and adjust baking times as necessary.


Leave a Reply